(To read about Day 1 of the cake class, click here).
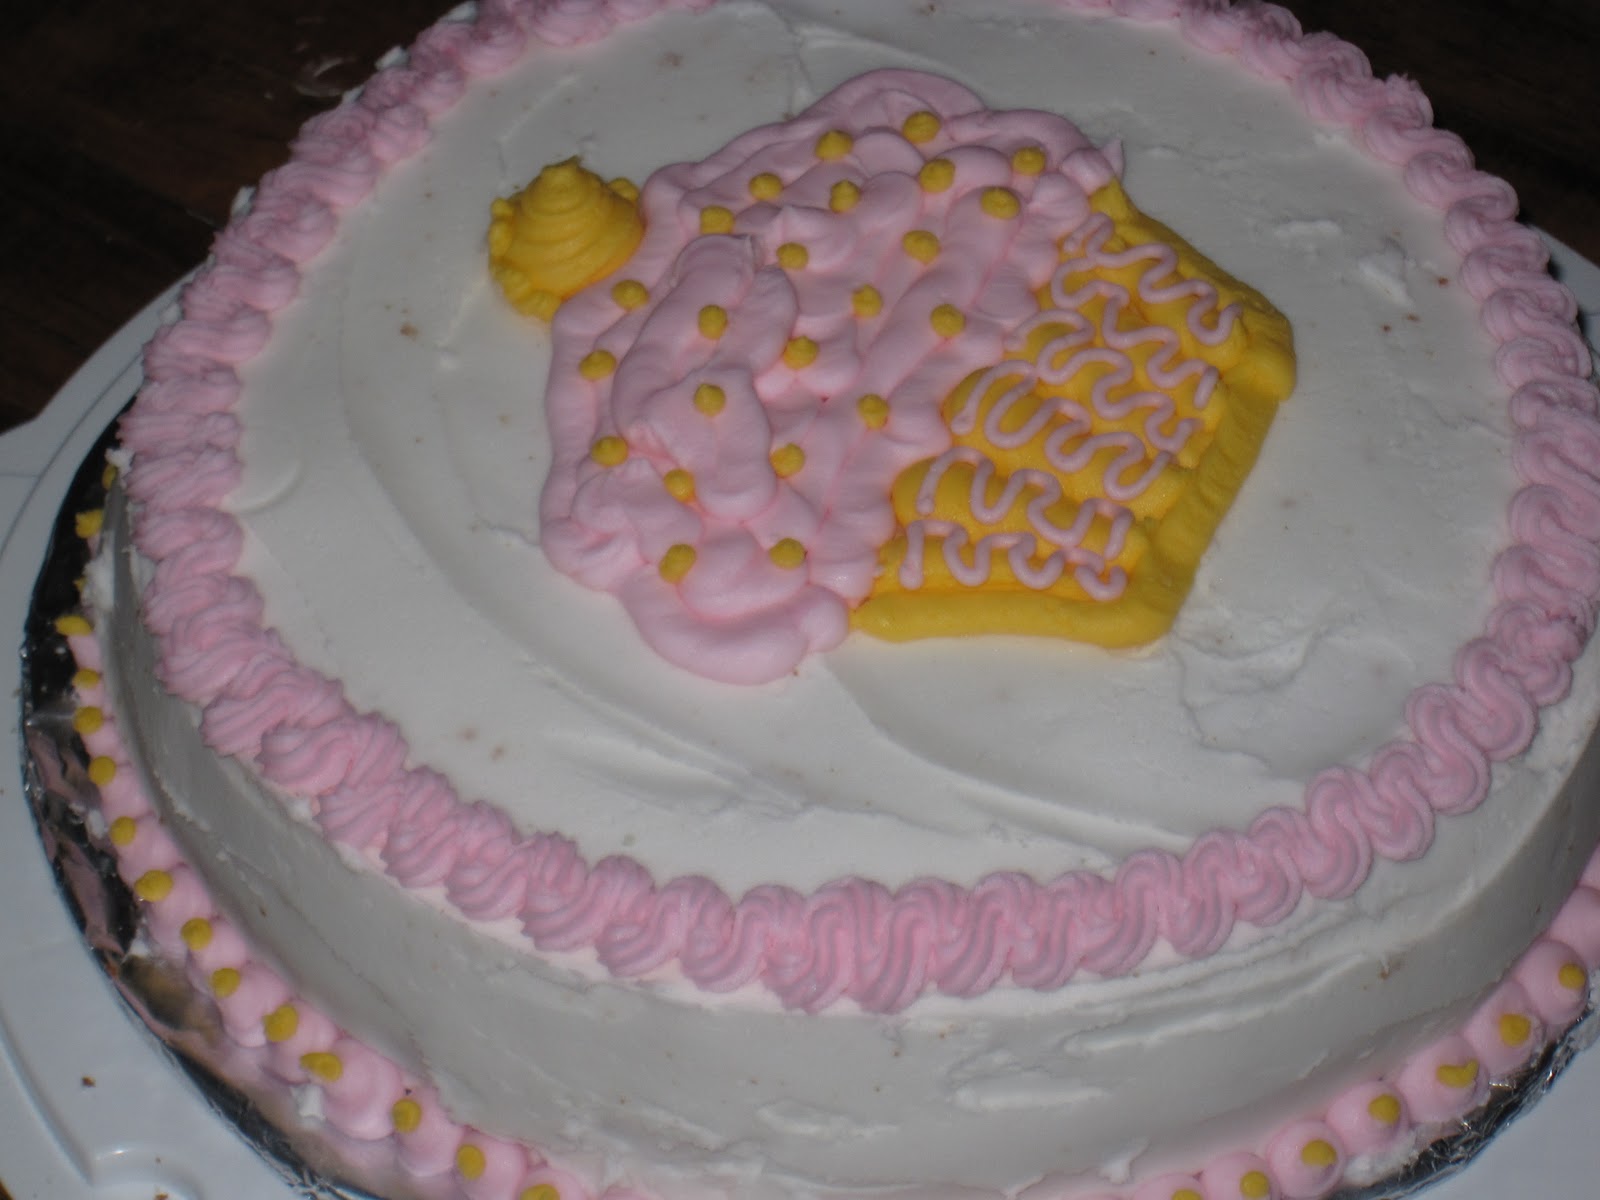
Above is the cake I decorated for day 2 of my Michael’s store cake decorating class, basic level.
This week’s class was much more hands on, as last week we pretty much just watched our instructor make icing and decorate a cake. This time we had to bring our own cake and 2 batches of homemade icing, along with our materials from our kits and instruction booklet. I also brought along some icing gel colours to make the icing different shades.
When I got to the class, the first thing we did was level the tops of our cakes and then flip them upside down, as the bottom of the cake was much sturdier to ice than the fluffy top. It was then optional to cut our cake in half and fill the middle with either icing, jam or pudding. I brought along chocolate pudding mixed with strawberries.
We then iced the cake with our icing and then learned how to create the cupcake design with clear piping gel. I’m not a big fan of piping gel, as I can’t see myself using it too often. I would much rather learn how to make flowers, which will be next week’s lesson when we bring cupcakes!
I bought her cookbook The Pioneer Woman Cooks along with my Cookie Craft book in January and I love it. I thought it was going to be just like her website, which is why I didn’t buy it right away since all of her recipes are online. But I’ll admit it, it’s easier to have a cookbook spread open in your kitchen during the baking process than a laptop displaying the recipe, but also running low on battery life.
When I first discovered her website, one of the recipes that intrigued me the most was that of her famous cinnamon buns. The recipe was simple, straightforward and I already had all the ingredients already in my pantry, which is a big plus for me. The only thing that scared me was the amount of cinnamon buns the recipe made – serves 8 people. Yikes! 99.9% of the time, I’m cooking for just Trevor and I. Plus I had to factor in Trevor’s lactose intolerance.
I also wanted my work pants to fit the next day.
This was where Amber at This Mommy Cooks came in. I came across her cooking blog when I was looking for a successful half-sized version of PW’s cinnamon buns. She posted step-by-step photos of her baking process and I figured that 4 servings would be easier than 8 servings. Half the temptation would be gone! My clothes would still fit the next day!
Yes, I finally bit the bullet and got myself a new mixer. Not just any new mixer mind you, but the most beautiful, pure KitchenAid Mixer ever. Literally, it’s presence in my kitchen is putting all my other appliances to shame. I may have to throw them all out and start again like in university.
I would like to thank all those who made this purchase possible:
– my old handmixer for dying in December. I loved you and I’m so glad that your final act was making royal icing for my first attempt at decorating cookies. Mind you, if I hadn’t made them and burnt out your engine, you would still be there. Thank you for being that sacrifice.
– my mother, who gave birth to me so close to Valentine’s Day that I would be able to celebrate my birthday recently and send me a birthday cheque for the purchase of a KitchenAid Mixer.
– Barnes & Castle, a discount appliance store in the GTA where I was able to purchase said KitchenAid Mixer for the awesome price of $188.99 before taxes and therefore convince my mother that she would not need to buy one online and thus save herself over a $150 in purchase and shipping fees. I’m a good daughter and an even better bargain hunter.
– Trevor, who came with me to said store on the windiest and busiest of all Saturdays to help me purchase said KitchenAid Mixer and lovingly carried it out of the store to the car, up three flights of stairs to our home and gently helped me extract it from its box. He must know that more baking is in his future.
Alright, I’m off to make some Pioneer Woman Cinnamon Buns for the busy week ahead. Even though the recipe doesn’t call for it, I’ll find an excuse to use my baby somehow.
Update: Since writing this post, I’ve received a lot of comments about wanting to take or register for cake decorating classes. Please note that I do not offer cake decorating classes. If you are interested in taking these types of classes at Michael’s, I recommend contacting your local store.
A couple weeks ago, I went to what I thought would be my first Michael’s basic cake decorating class. Due to that unfortunate mix-up, I was put in the correct class which started last night. All I could think was “FINALLY!”
This time around, it was such a relief to arrive at the Michael’s store craft room and find people with the required sugar cookies laid out. Our class was all females with a nice mixture of ages and the instructor was wonderfully informed, chatty and super friendly.
The only dull thing was that the first class was, to put it mildly very boring. At least for me.
We started out by going through the Wilton’s booklet that came with the class (these babies are $25 at Bulk Barn, so I think that was a nice steal since the class was only $22). She went over the secrets to baking a good cake and how to make your own buttercream icing with shortening. It was good for a lot of people, but except for the odd little fact, this was nothing new to me. The instructor then pulled out a hand mixer and showed us how to make homemade icing and then we passed around the bowls of icing to compare the consistencies and which ones are used depending on if you are icing the cake or piping borders.
YAWN (I’m sorry).
Halfway through the 2 hour class, she then pulled out the piping bags (YES!) and we learned how to properly fill them without getting a mess everywhere (something I’m still working on). Cookie royal icing is way different than cake buttercream icing, so I think it was easier to get into the piping bag. I did learn that I need to recut my featherweight piping bags as my markings are a little off and that might make a difference in controlling my piping and why my tips are always a little wobbly.
Our instructor pulled out a plain vanilla cake that she made for the class and showed us how to level it with a cake leveler (we joked throughout the class about how everything she showed us was getting us on the Wilton’s brand) and then she filled the middle of the cake with icing and vanilla pudding. She iced the cake with the icing she showed us how to make and then showed us how to spread it with minimal crumbs.
For the rest of the class, we then got to use our piping bags with the star tip #18 and practice making stars on our practice board and our cookies that we brought. As a last sweet treat, our instructor cut up the cake she made and we each got to have a delicious slice.
Despite the slow start, it was a very good class. I felt totally in my element around other people interested in learning cake decorating. I also think its better that I start in the basics, even if nothing is really new to me right away. Nothing would be worse than being cocky and trying to take the next level class and feeling left behind and useless with icing leaking out of my piping bag.
Some great things I learned from the first class:
1). Lighter pans are better for baking cakes. It cooks more even and darker pans are more likely to burn the bottom of your cake.
2). Only fill your pans half-way with cake batter to prevent the top cake lump from forming (although this part is usually cut off later when you level the cake).
3). When measuring your piping bag with the coupler base, mark the bag against the first ridge where the tip screwed in and then cut it.
Next class we get to ice and decorate a cake with a cupcake design so we have to bring two batches of homemade buttercream icing (the Wilton’s recipe) and a round cake.
Looks like I need to buy a round cake pan for next week!
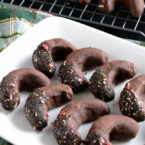
After a long day at work, nothing is more delicious than a plate of warm, homemade cookies.
Especially if the cookies are made with chopped white chocolate.
And roasted macadamia nuts. (I find that the unsalted kind works the best.)
Yes, I’m still hand-mixing my cookies. If it makes you feel better, I think its making my arms stronger. I like to think of it as exercise from eating all these baked goods.
Canadian food blogger, baking and eating her way through life. Musical theatre fanatic. Personal finance nerd. Sometimes runner/yogi. Green smoothies are pretty amazing.