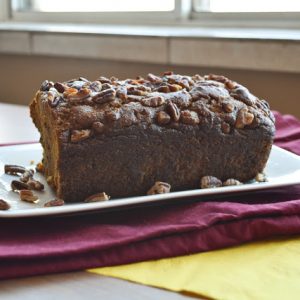
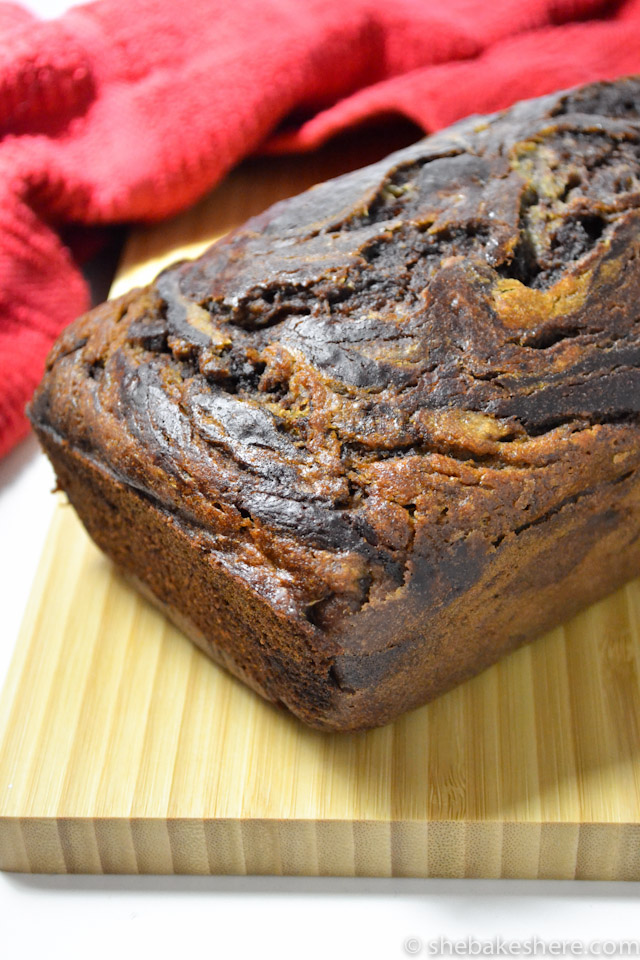
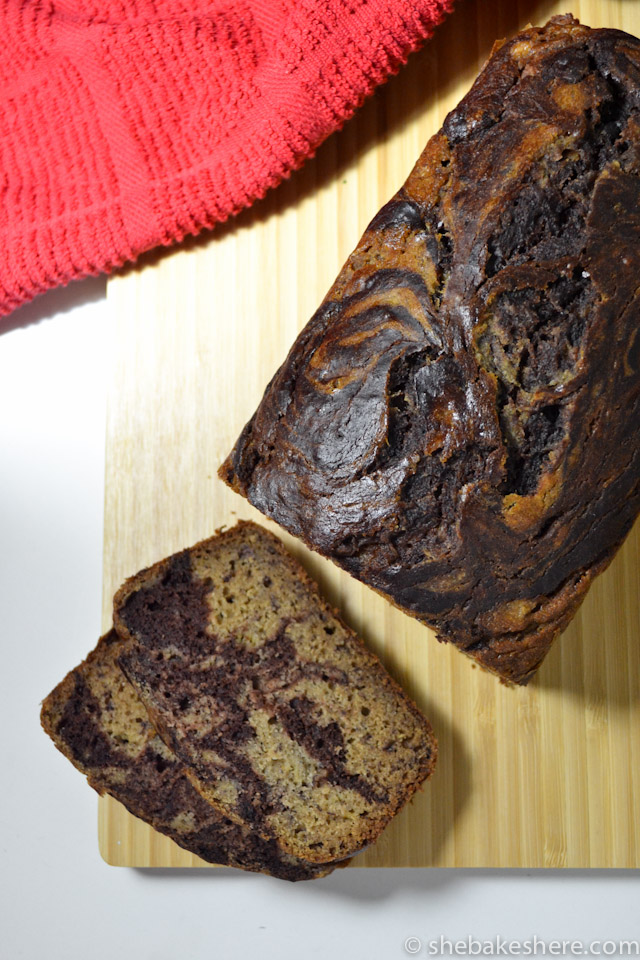
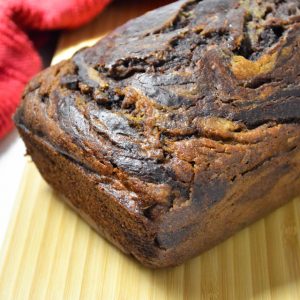
Chocolate Swirled Banana Bread
One of the things I love about our condo is the amount of natural sunlight we get on a sunny day. When we first moved in, I couldn’t get enough of it because I could rush home from work (shorter commute, yay!) and I still had enough time to take my photos. It was so bright we could go most evenings without turning on our living room, dining room or kitchen lights as long as we kept our window blinds open. It was August and I was completely delusional.
Enter November and daylight saving time. I knew it was too good to last and that’s when I began my hunt for an artificial light.
I’d been avoiding this purchase for a couple years now, mainly because everyone knows that natural light always is better for food photography. While I still completely agree with this, I had to face the fact that natural light isn’t always readily available. For the last few weeks I had been slowly driving myself crazy trying to fit my schedule around the short window where I could take photos and I would openly curse days where I wanted to, but then something (a prior engagement, a recipe flop, the sun hiding in the clouds!!!!) would prevent me from doing so. If that wasn’t a recipe for a burnout, then I don’t know what is.
During my search, I found a lot of different advice from fellow food bloggers. There was some support for certain tabletop light products, but the price was a little high and I was especially discouraged by the Amazon.com reviews. A few bloggers had instructions for how to create your own (cheap) lightbox, but I was looking for something compact that could easily be stored out of sight when I wasn’t using it. I almost gave up my search and then last week I came across Julie’s post How to Photograph Food. My favourite tip she gave was on lighting and how sometimes all you need is a simple lamp and a daylight balanced bulb to help simulate natural light to get you through the winter nights.
With this in mind, I picked up a cheapo desk lamp and a daylight balanced bulb (total $15 from Walmart), and armed myself with a bunch of white boards to help bounce the light around. At first I found the light to be a little too harsh, but I was able to soften it with a sheer, white scarf I had on hand. It took a lot of playing around to achieve the look that I wanted, but in all I was pleased with how some of the photos turned out. Not perfect (there are a few bright spots), but this is definitely something to learn from and work on in the upcoming months. Plus, I was able to bake this delicious chocolate swirled banana bread and take these photos at 9pm without worrying about making time on an already busy weekend.
Chocolate Swirled Banana Bread
Ingredients:
- 1 cup all-purpose flour
- 1/2 cup whole wheat pastry flour (or more all-purpose flour)
- 1 tsp baking soda
- 1 tsp cinnamon
- 1/4 tsp salt
- 1 1/2 tbsp good quality cocoa powder
- 1/2 cup melted butter/margarine
- 3 large, ripe bananas
- 1/2 cup packed brown sugar
- 2 large eggs
- 1 tsp vanilla extract
Directions:
- Preheat oven to 350*F and lightly spray your loaf pan.
- In a small bowl, whisk togther all-purpose flour, whole wheat pastry flour (if using), baking soda, cinnamon and salt. Set aside.
- Melt butter/margarine in a microwave-safe bowl and let cool to room temperature. About 25-30 seconds on high and 5 minutes of resting on the kitchen counter was enough time for me
- In a large bowl, mash bananas and add melted butter/margarine, brown sugar, eggs and vanilla extract. Mix together until well-combined.
- Gradually add the flour mixture to the wet mixture, stirring gently until no more flour is visible. Scoop 1 cup of batter back into a small bowl and stir in cocoa powder. To save on dishes, I used same small bowl the flour mixture was in.
- Pour half of the light-coloured batter into your loaf pan and top with half of the chocolate batter. Using a butter knife, gently swirl the mixture to create a marble effect. Top with the remaining light-coloured batter and remaining chocolate batter and swirl together again.
- Bake for 50-55 minutes until the top is a golden brown and a toothpick inserted in the middle of the loaf comes out clean. Remove from the oven and let cool in the pan for 10 minutes. Remove from the pan and continue cooling on a wired rack.
Recipe adapted from Inspired Taste