Honey Castella Cake
I’m embarrassed to admit how long I’ve been holding to this recipe. Remember when I went to visit my Grandma’s house and we made cinnamon buns? That’s how long. Trevor and I didn’t even have a wedding date picked out yet. And now here we are, as newlyweds, and I’m proud to say that I finally made my Grandma’s honey castella cake recipe.
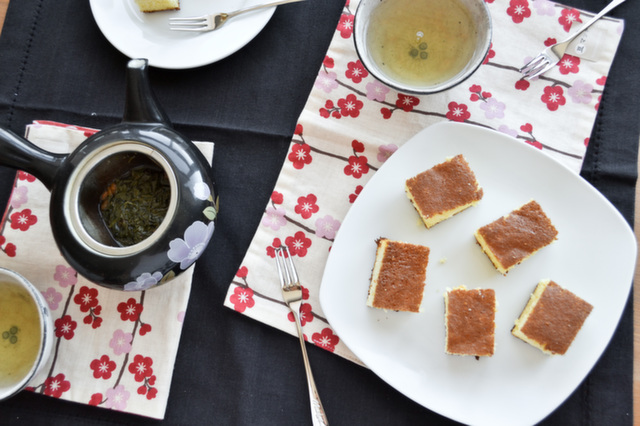
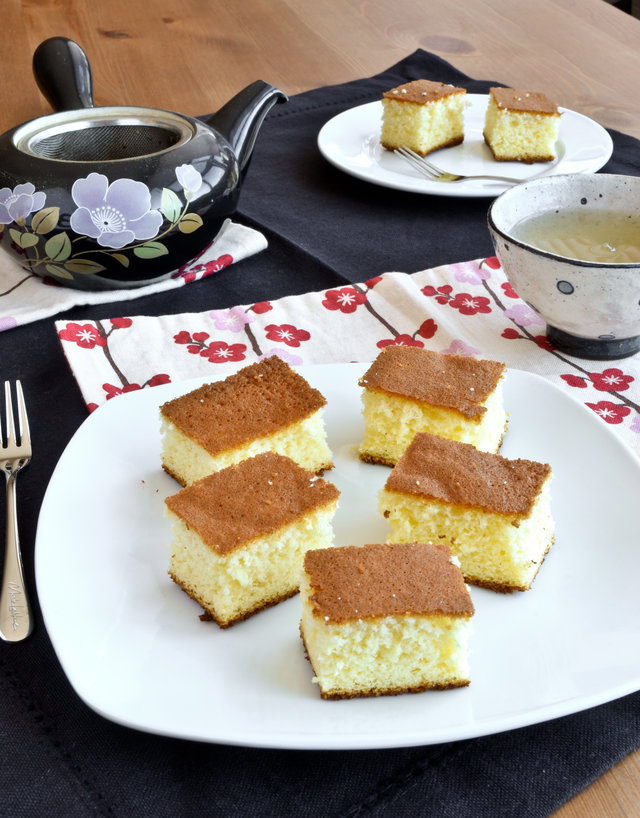
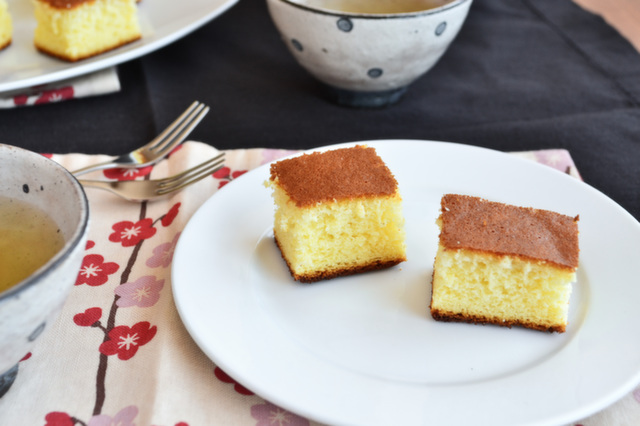
If you’ve never heard of castella, it’s a popular Japanese sponge cake that is very soft, light and has a simple and mild flavour. The cake has very small pores due to the beating of the eggs and the use of bread flour rather than traditional cake or all-purpose flour. It’s not baked with oil or butter and is normally served at tea time in tall, thin slices. Even though I’ve had a copy of this recipe in my possession for a while, I developed a habit of picking up personal-sized cakes at the numerous Asian-style bakeries on Spadina Avenue.
I would have made this cake sooner, but I have to admit that I was originally too intimidated to try it right away. Just looking at the number of eggs in the recipe always sent me into panic mode. Plus the sugar and bread flour are weighted in grams rather than measured in cups. What if I screwed everything up and the cake turned out too dense? I googled other castella recipes for some tips and inspiration and they always came with a difficulty warning for beginners. I wouldn’t consider myself a beginner baker, but I had never made a recipe this detailed before so I was convinced that something would go wrong.
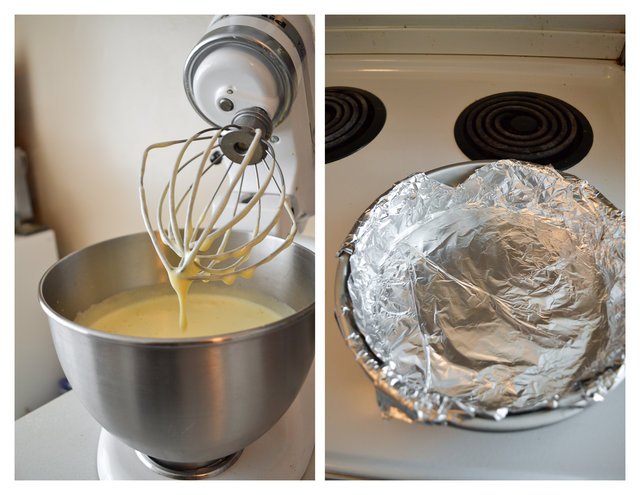
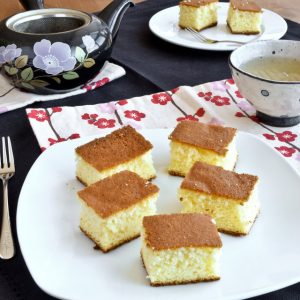
Well I’m happy to report how much easier this recipe was than I had expected (or, you know, feared). Some key notes are to invest in a food scale (I think mine was under $5), keep an eye on the clock while your eggs are beating, sift your flour not once but twice and make sure that your cake batter has no air bubbles prior to going into the oven. As you can tell in my photos that my cake turned out a little more crumbly than I wanted and didn’t quite have the completely smooth and poreless look that castella is known for, but I thought it was great for my first attempt.
A few things I will do differently next time:
- strain the batter through a wire sieve before pouring into the pan
- use a loaf pan to achieve a taller cake (I used two 8″ round pans)
- use a sharper knife for slicing
Appearances aside, the cake itself was delicate and had a sweet subtle taste. It was a nice change from all the chocolate that I normally showcase here. Not that anything is wrong with chocolate, but change is always good. As is facing your baking fears.
Honey Castella Cake
Ingredients:
- 4 egg yolks
- 4 eggs
- 180 grams turbinado sugar
- 2 tbsp mirin
- 2 tbsp honey
- 1 tsp cream of tartar
- 100 grams bread flour
Directions:
- Preheat your oven to 350*F and line your cake pan with aluminum foil.
- In a large bowl, beat the eggs and egg yolks on medium speed for 2 minutes.
- Stop the mixer and add turinado sugar, mirin, honey and cream of tartar. Beat on high for 5 minutes.
- While the mixer is beating, measure your bread flour and gently sift the flour twice. If you do not own a flour sifter, you can use a wire coriander.
- After 5 minutes, stop your mixer. The egg mixture should be light and foamy. Gently add the bread flour and fold in with a spatula until the flour is well combined.
- Pour your batter into your aluminum foil lined pan and gently tap to bring air bubbles to the surface. You can pop the bubbles with a chopstick.
- Bake in your oven for 40-45 minutes until a toothpick comes out clean. The tops of the cake will be very brown.
- Remove the cake from the oven and immediately drop the pan about a foot high onto your counter. This will prevent the cake from shrinking.
- Once the pan is cool to the touch, you can remove the cake. Flip the cake upside down on a large sheet of parchment paper and remove the foil. The cake will still be warm, so wrap them in parchment paper and place in a plastic bag to preserve the moisture. Chill the cake upside down in the bags in the fridge for a couple hours or overnight.
- To serve, trim the cake edges and cut into small slices.